Documentation Index
Fetch the complete documentation index at: https://www.latitude.sh/docs/llms.txt
Use this file to discover all available pages before exploring further.
Longhorn is a free, open-source distributed block storage system for Kubernetes that keeps things lightweight while handling replication and persistence for your workloads. If you’ve got a K8s cluster deployed on Latitude.sh and need reliable container storage, this guide will get you there.
Prerequisites
Step 1: Prepare your cluster
Check available disks
Run lsblk on each node to find available disks and partitions to dedicate to Longhorn.
Label nodes (Optional)
Label your nodes to control which ones will be used for Longhorn storage:kubectl label nodes <node-name> longhorn=true
Step 2: Install Longhorn
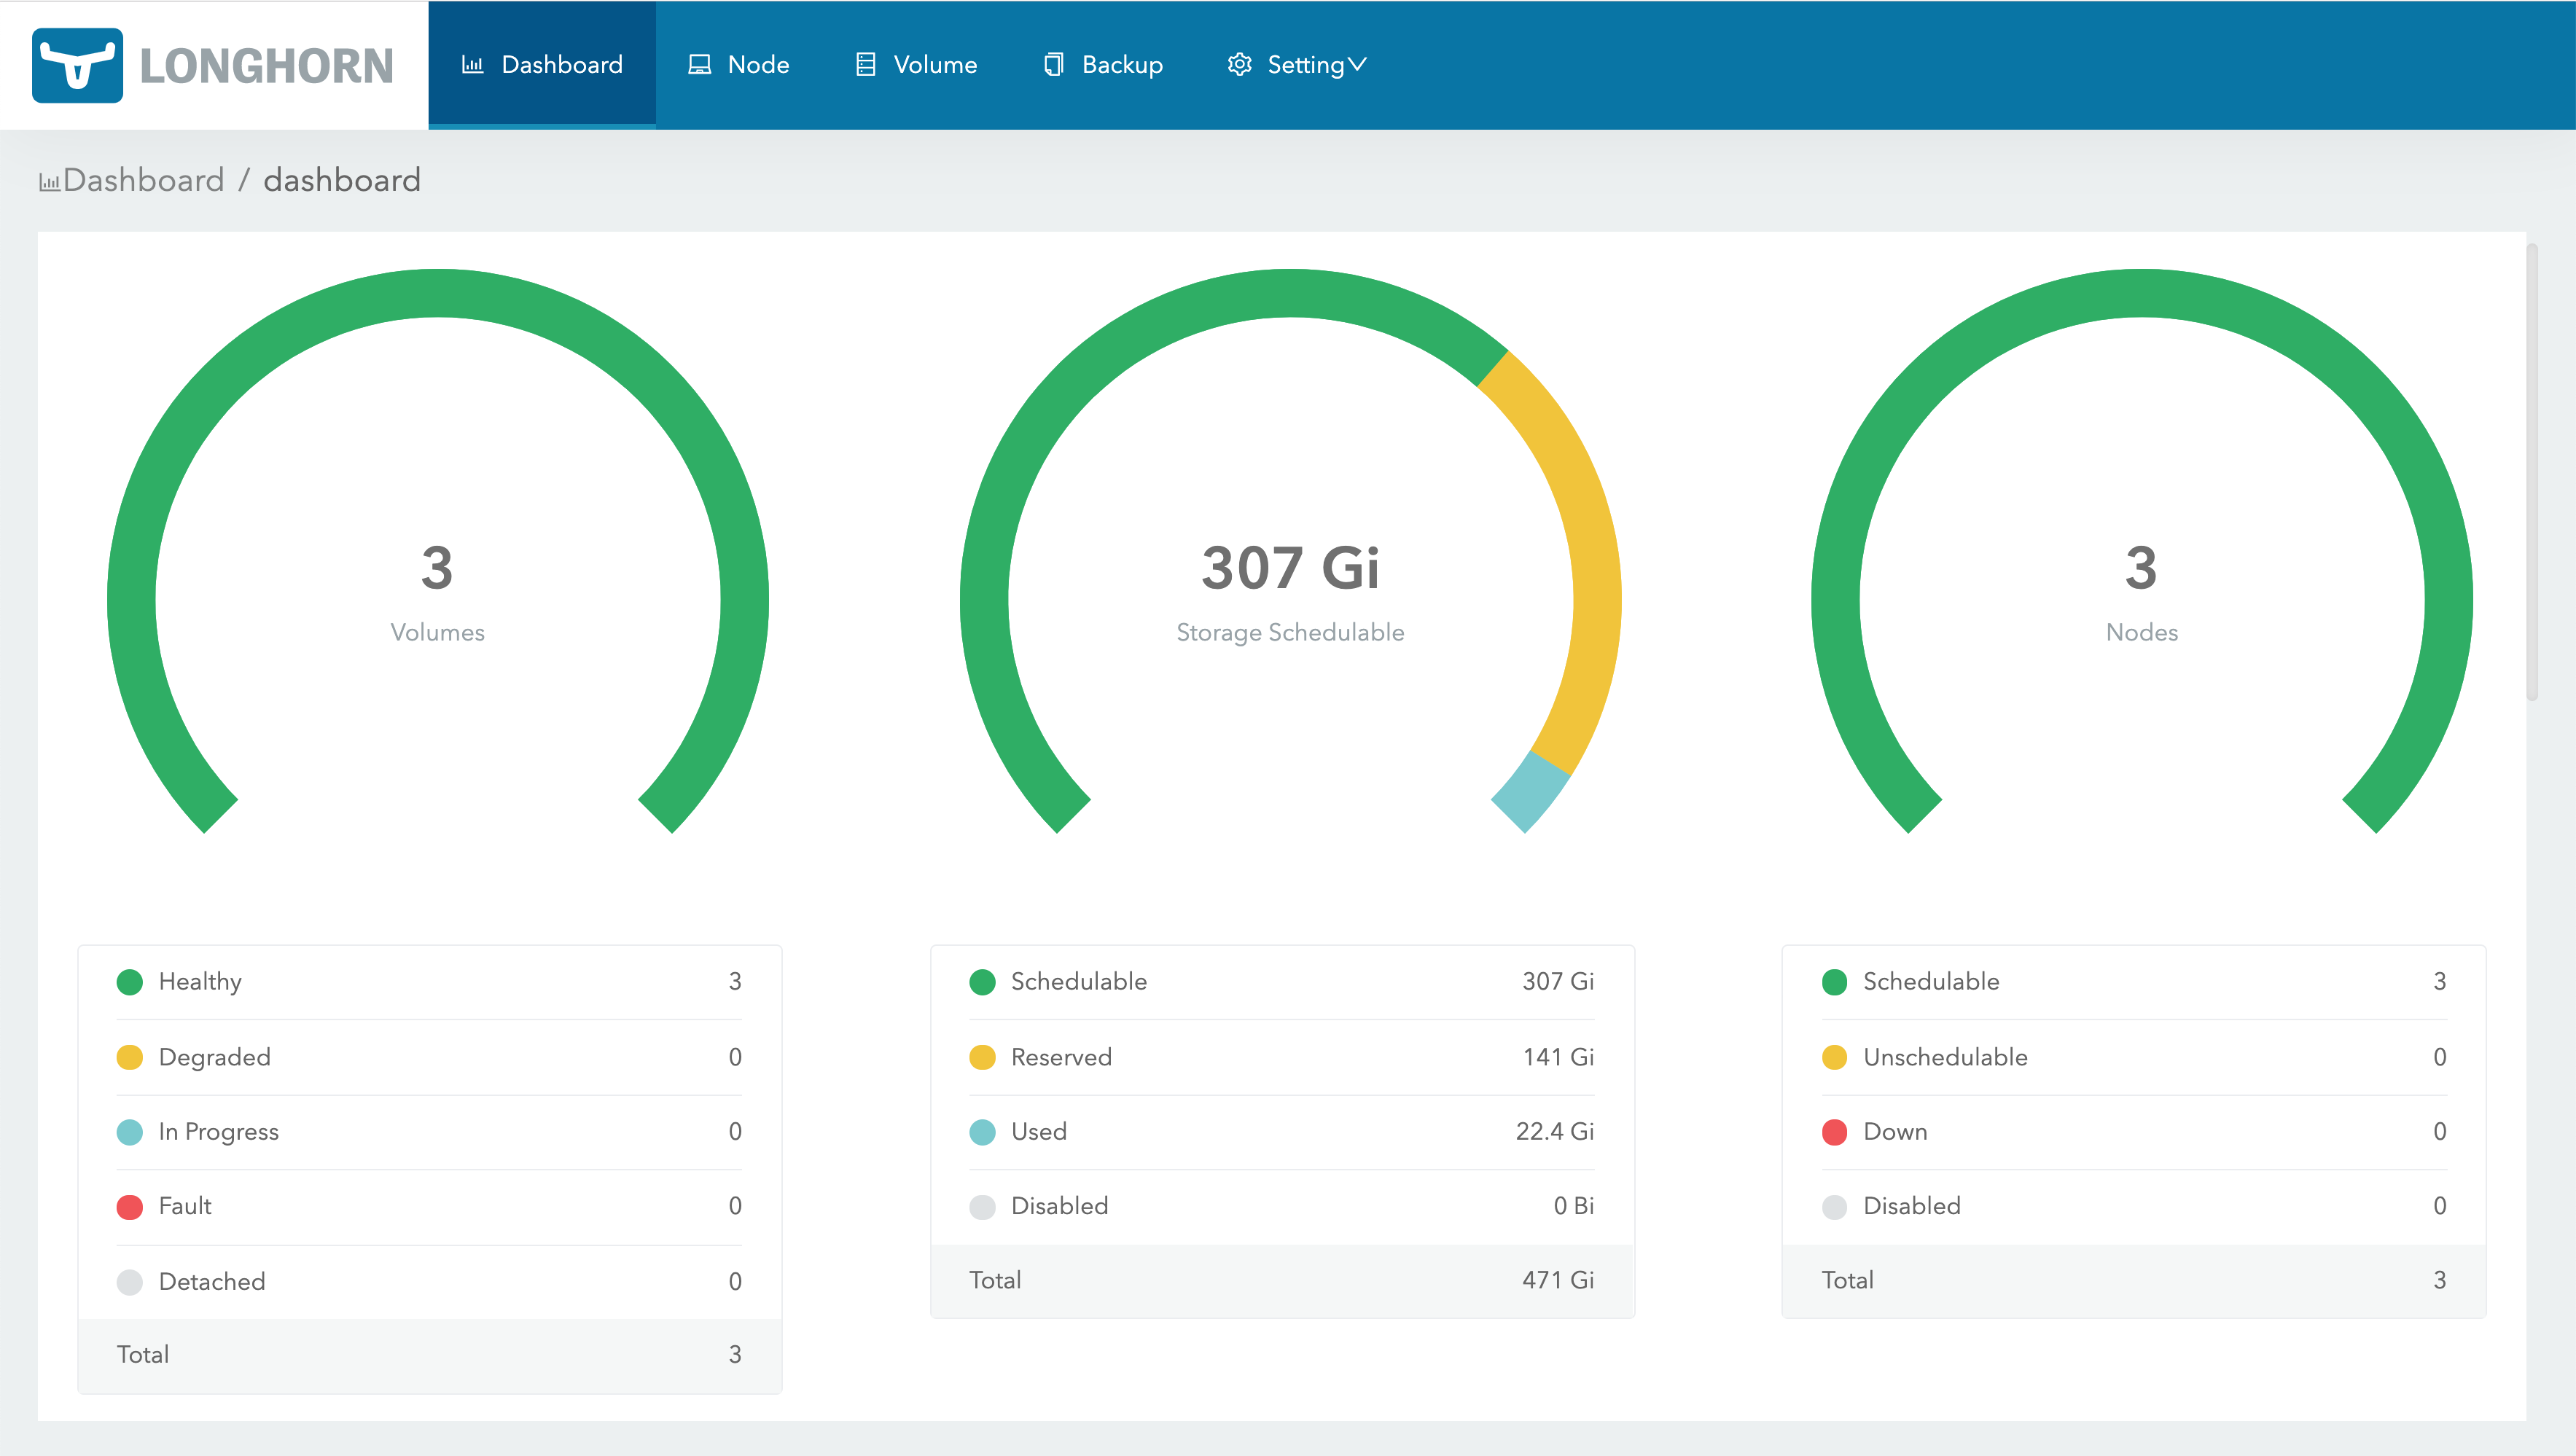
Longhorn can be installed on a K8s cluster in several ways. In this guide, we’ll go with Helm.
Add Longhorn repository
Add the Longhorn Helm repository:helm repo add longhorn https://charts.longhorn.io
helm repo update
Install Longhorn
Run this command to install Longhorn:helm install longhorn longhorn/longhorn --namespace longhorn-system --create-namespace
Verify installation
Verify the installation:kubectl -n longhorn-system get pod
All pods should be running without errors.
Step 3: Access the Longhorn UI
Check services
Run this command to check if the Longhorn services are up:kubectl -n longhorn-system get svc
The output should be something like this:
Set up port forwarding
Set up port forwarding to the frontend service:kubectl port-forward services/longhorn-frontend 8080:http -n longhorn-system
Access dashboard
Navigate to http://localhost:8080 in your browser to access the Longhorn UI. You’ll be taken to this dashboard:
Check nodes
In the Longhorn UI, navigate to Node and check if your disks are detected automatically.
Define disk usage limits
Define disk usage limits and scheduling. Make sure your nodes have enough space to handle the intended workload.
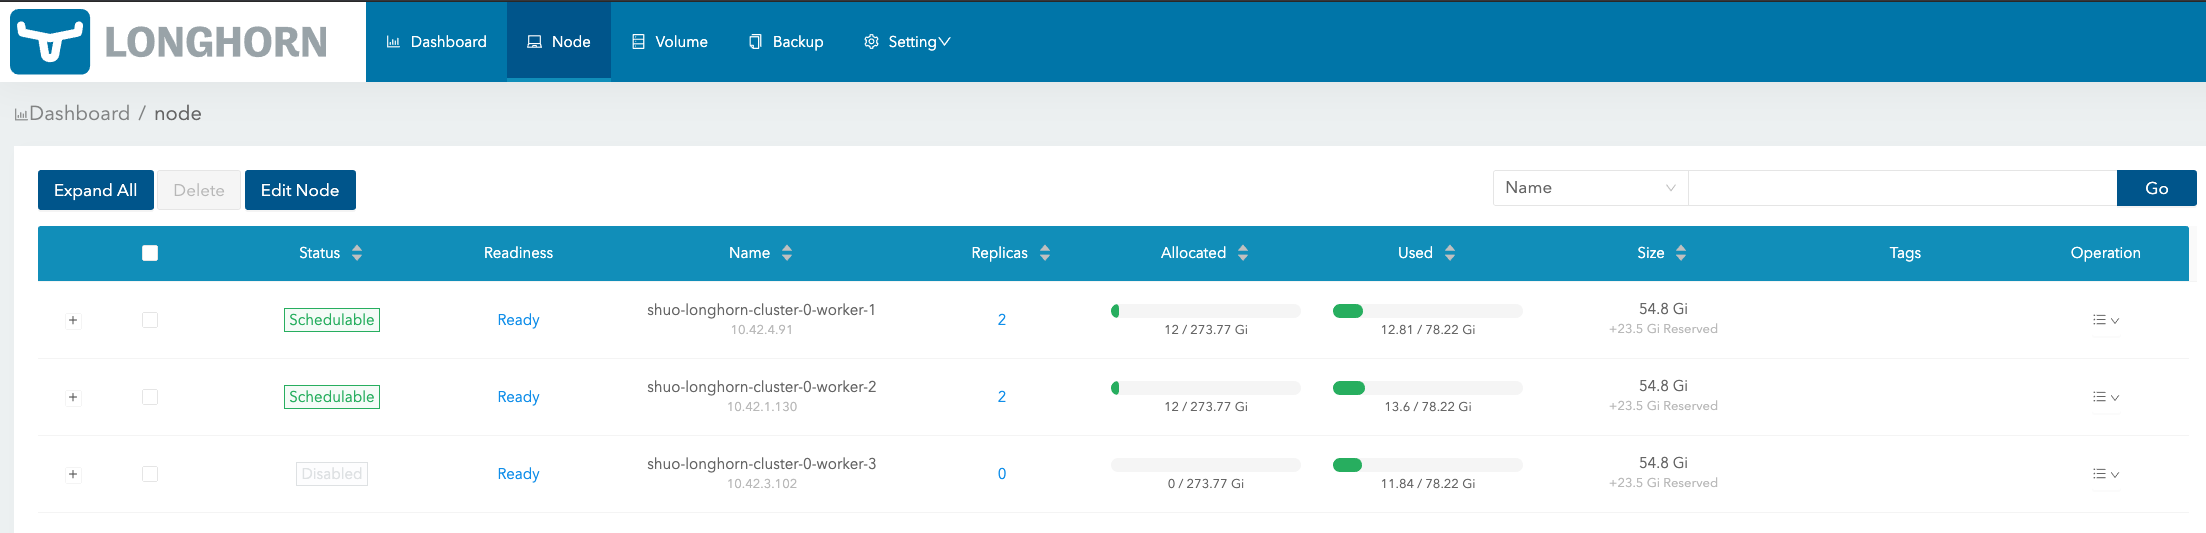
Step 5: Create a StorageClass
Create StorageClass manifest
Create a StorageClass manifest named longhorn-storageclass.yaml:apiVersion: storage.k8s.io/v1
kind: StorageClass
metadata:
name: longhorn
provisioner: driver.longhorn.io
allowVolumeExpansion: true
reclaimPolicy: Delete
volumeBindingMode: Immediate
Apply StorageClass
Apply the StorageClass:kubectl apply -f longhorn-storageclass.yaml
Set as default (Optional)
Set the StorageClass as default:kubectl patch storageclass longhorn -p '{"metadata": {"annotations":{"storageclass.kubernetes.io/is-default-class":"true"}}}'
Step 6: Create a PersistentVolumeClaim (PVC)
Create PVC manifest
Create a PersistentVolumeClaim YAML file named longhorn-pvc.yaml:apiVersion: v1
kind: PersistentVolumeClaim
metadata:
name: longhorn-pvc
spec:
accessModes:
- ReadWriteOnce
storageClassName: longhorn
resources:
requests:
storage: 5Gi
Apply PVC
Apply the PVC:kubectl apply -f longhorn-pvc.yaml
Verify PVC
Verify the PVC:Make sure the status shows Bound to confirm it worked.
Step 7: Use the PVC in a Pod
Create Pod manifest
Create a Pod that Uses the PVC, save this as longhorn-pod.yaml:apiVersion: v1
kind: Pod
metadata:
name: longhorn-test-pod
spec:
containers:
- name: longhorn-test
image: nginx
volumeMounts:
- mountPath: "/usr/share/nginx/html"
name: longhorn-storage
volumes:
- name: longhorn-storage
persistentVolumeClaim:
claimName: longhorn-pvc
Deploy Pod
Deploy the Pod:kubectl apply -f longhorn-pod.yaml
Check Pod status
Check Pod status:The Pod should be running without issues. You can check if the data persists by inspecting the mounted directory.
Troubleshooting
- If Longhorn nodes show as unschedulable, check disk space and ensure no taints are blocking pods.
- For performance tuning, you can adjust the number of replicas for each volume in the Longhorn UI under Settings > Default Settings.
- If using firewalls, ensure ports 9500-9600 are open for communication between Longhorn components.
That’s it!
You’ve got Longhorn running and ready to handle your persistent storage needs.