
Access server creation
Sign in to your Latitude.sh account, navigate to Bare metal > Servers in the sidebar, then click Create server.
Choose hardware and operating system
Select a server based on your workload and location needs. If the configuration you need isn’t available, the page may show Join waitlist or Ask custom build. Choose Join waitlist to get notified when stock is available, or Ask custom build to request a custom server setup. You can also contact the team directly.Select the Operating System. If the OS you’re looking for isn’t offered, you can use a custom image instead.
Configure access and automation
Add SSH keys if desired. Password authentication is enabled by default and disabled when you deploy with an SSH key. This means the dashboard won’t show the password to you after deployment. Learn more about creating and adding your SSH keys here.Optionally, select or create a User Data script. User data scripts run automatically on the server’s first boot through the cloud-init process. See the Server Configuration section for more details.Optionally, open the Advanced section to configure RAID or a custom disk layout. This is available when your server has at least two disks and you select a compatible operating system. Enable Custom disk layout to control how disks are grouped into OS, storage, and raw volumes — including the RAID level, filesystem, and mount point of each — or use Quick apply to set a simple RAID level. Use the /plans endpoint to check compatibility. Learn more about custom disk layout.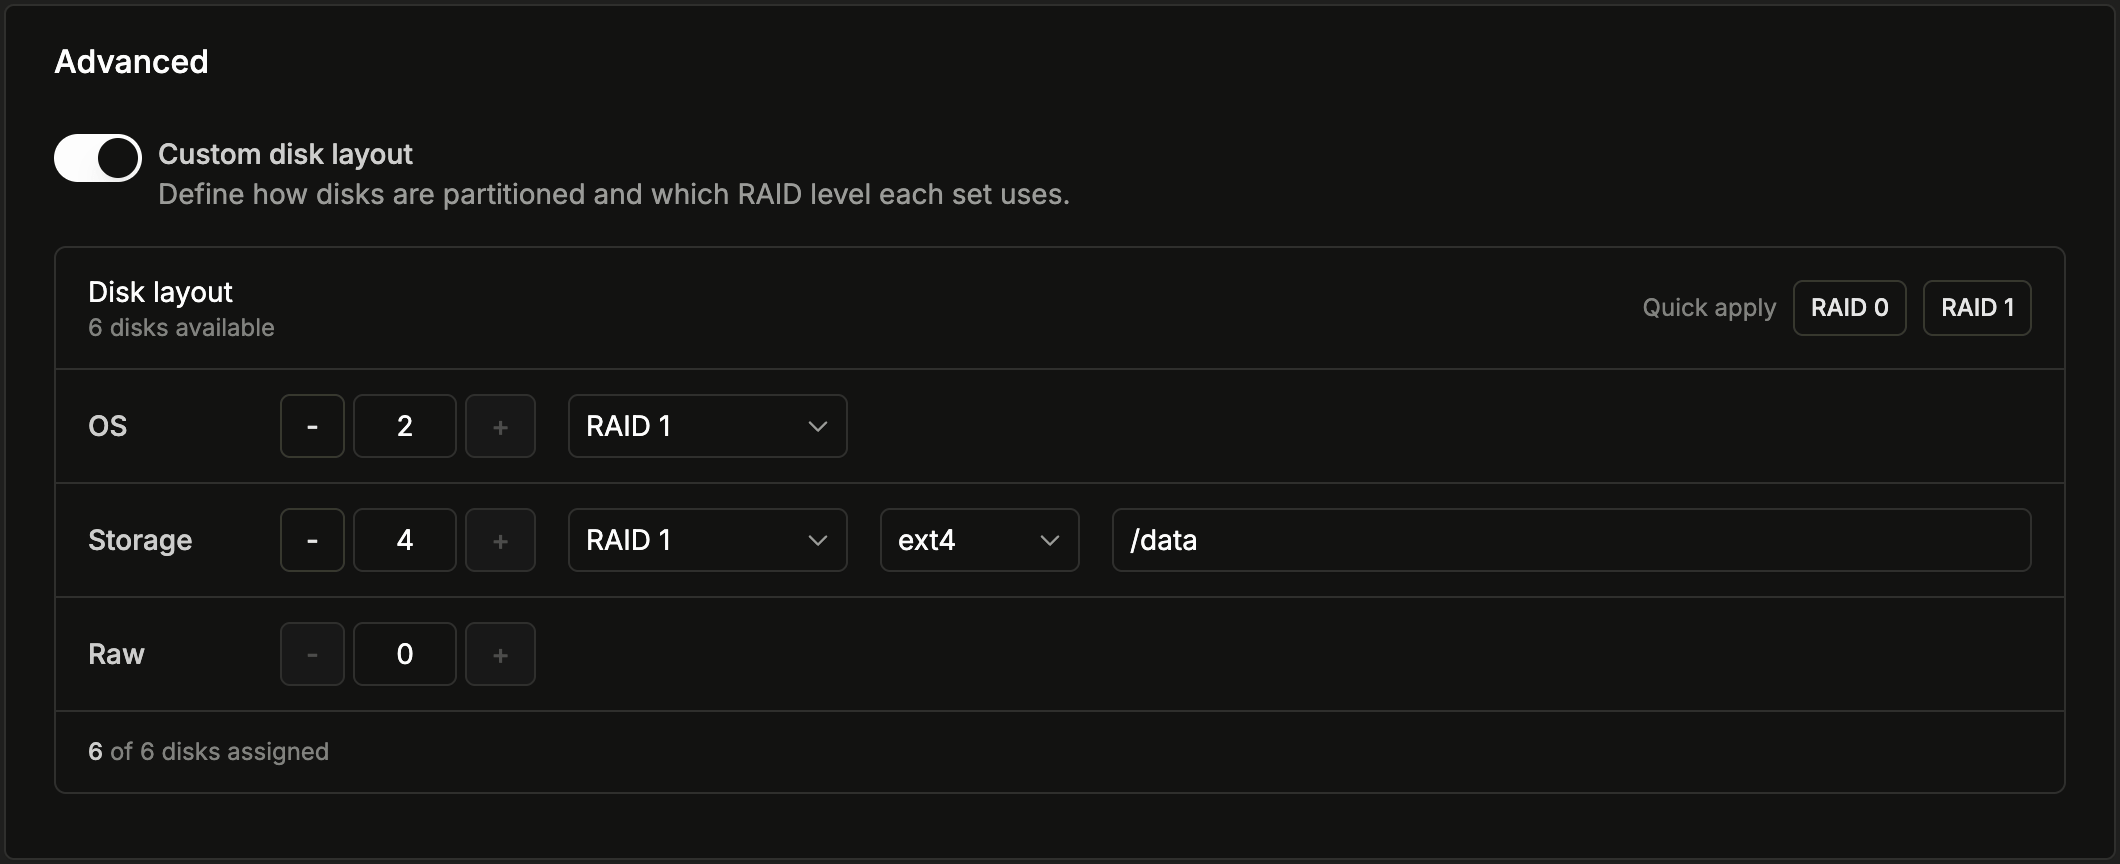
Latitude.sh does not provide a root password when you select one or more SSH keys.
Set billing and quantity
Select the Billing Type. For On Demand billing, choose between hourly and monthly when deploying an instance. See the Billing section for more information.Choose the number of servers to deploy. Select up to 5 servers to deploy at once using the quantity selector.